- Oct 4
Color Filling Engraved Acrylic (Or: How I Made Laser Engraving Look BOMB AF)
- Samantha Ludwitzke
- 0 comments
Okay, so I've been messing around with engraved acrylic and I found a trick that is almost too easy. I feel like I should be doing something more complicated to earn results this good, but nope. Paint, paper towel, done. Literally that easy.
Here's how it goes.
What You'll Need
• Glossy acrylic, pre-masked (paper is best!) by the vendor (do not skip this, it's the whole secret)
• Craft paint (and literally does not need to be fancy- the cheap bottle with the apple on it from the craft store or Walmart does just fine)
• Paper towel
• A plastic scraper
• Baby wipes
• A laser (I'm using my Mira 5)
The Steps
1. Start with pre-masked glossy acrylic.
Buy it with the masking already on from the vendor. That’s the trick. The masking is basically a little shield that keeps paint off the surface, so you only get color where you engraved. Future you will be so grateful. And then the gloss acrylic wipes clean for anything that smudges while you remove the masking, 0 stains. Match made in heaven.
2. Engrave it.
I ran mine at 400/50/300 with no air assist on the Mira 5. [for reference that is my speed/power/LPI] Turning the air off is on purpose. You want those lines to stay nice and clean.
3. Paint it. Be messy.
Grab your craft paint and a paper towel and dab it into every engraved line. Don't be shy about it. Saturate the heck out of it. You want paint packed into all the little grooves. Literally make a mess. My choice of red paint made it look like my name was Carrie while I was in the middle of it, and it ended up looking perfect.
4. Scrape off the masking.
Take a plastic scraper and peel and scrape the masking away. Let’s be real, it’s definitely a little messy, and it is annoying to clean up. The scraper is so you don’t f*#% up your fingernails like I did. Yeah, it sucks, but it is a critical step in the paint fill process, so we have to deal with masking removal. Suck it up and just get it over with.
5. Baby wipe cleanup.
I literally laughed when I first heard people used baby wipes for laser stuff. And then I had a baby and tried them. And now I will never go without. Once all the pesky masking is gone, you’ll probably have smudges and will be like what’s the point of masking all this? But it keeps the acrylic MOSTLY clean, so you can clean up the remnants. Yes, questioning your life choices is an optional step. Run that baby wipe over the acrylic to clean off any leftover smudges. Much better than scraping paint off with your fingernails. Ask me how I know.
And that's it. Bada bing, bada boom, done.. No spraying clear coat, no using special markers… literally, just let the professionals apply the masking so it’s super secure, then dab the heck out of that paint until you feel like it has to be overkill, and then some more. Clean it up and voila- pretty as can be.
The reason I say GLOSS only...
I did this most recently on white gloss acrylic with red paint and the contrast is so good. Crisp red lines on a shiny white surface, and it honestly looks printed. It’s like the perfect holiday candy cane vibe, too. Cheap craft paint and a paper towel. Who would’ve thunk it.
BUT. You need to know. You won’t get the same effect on matte, especially not matte white. The problem? Matte acrylic stains. Gloss will come clean, 99% of the time. But matte does not, and matte white is the worst of the worst. Like, I’ll use any other color ever before I reach for matte white, that’s how bad it stains. You could just look at it wrong and it will smudge. Gloss is much much more forgiving.
This also goes for anything with a glossy finish. Pearl, shimmer, flake... as long as it's smooth and shiny, you should be good for easy clean up. Anything matte? The paint will grip on that slightly textured surface and make your life a nightmare. Just trust me.
Exhibit A: mid-chaos, I call this “can you believe this isn’t red acrylic?”
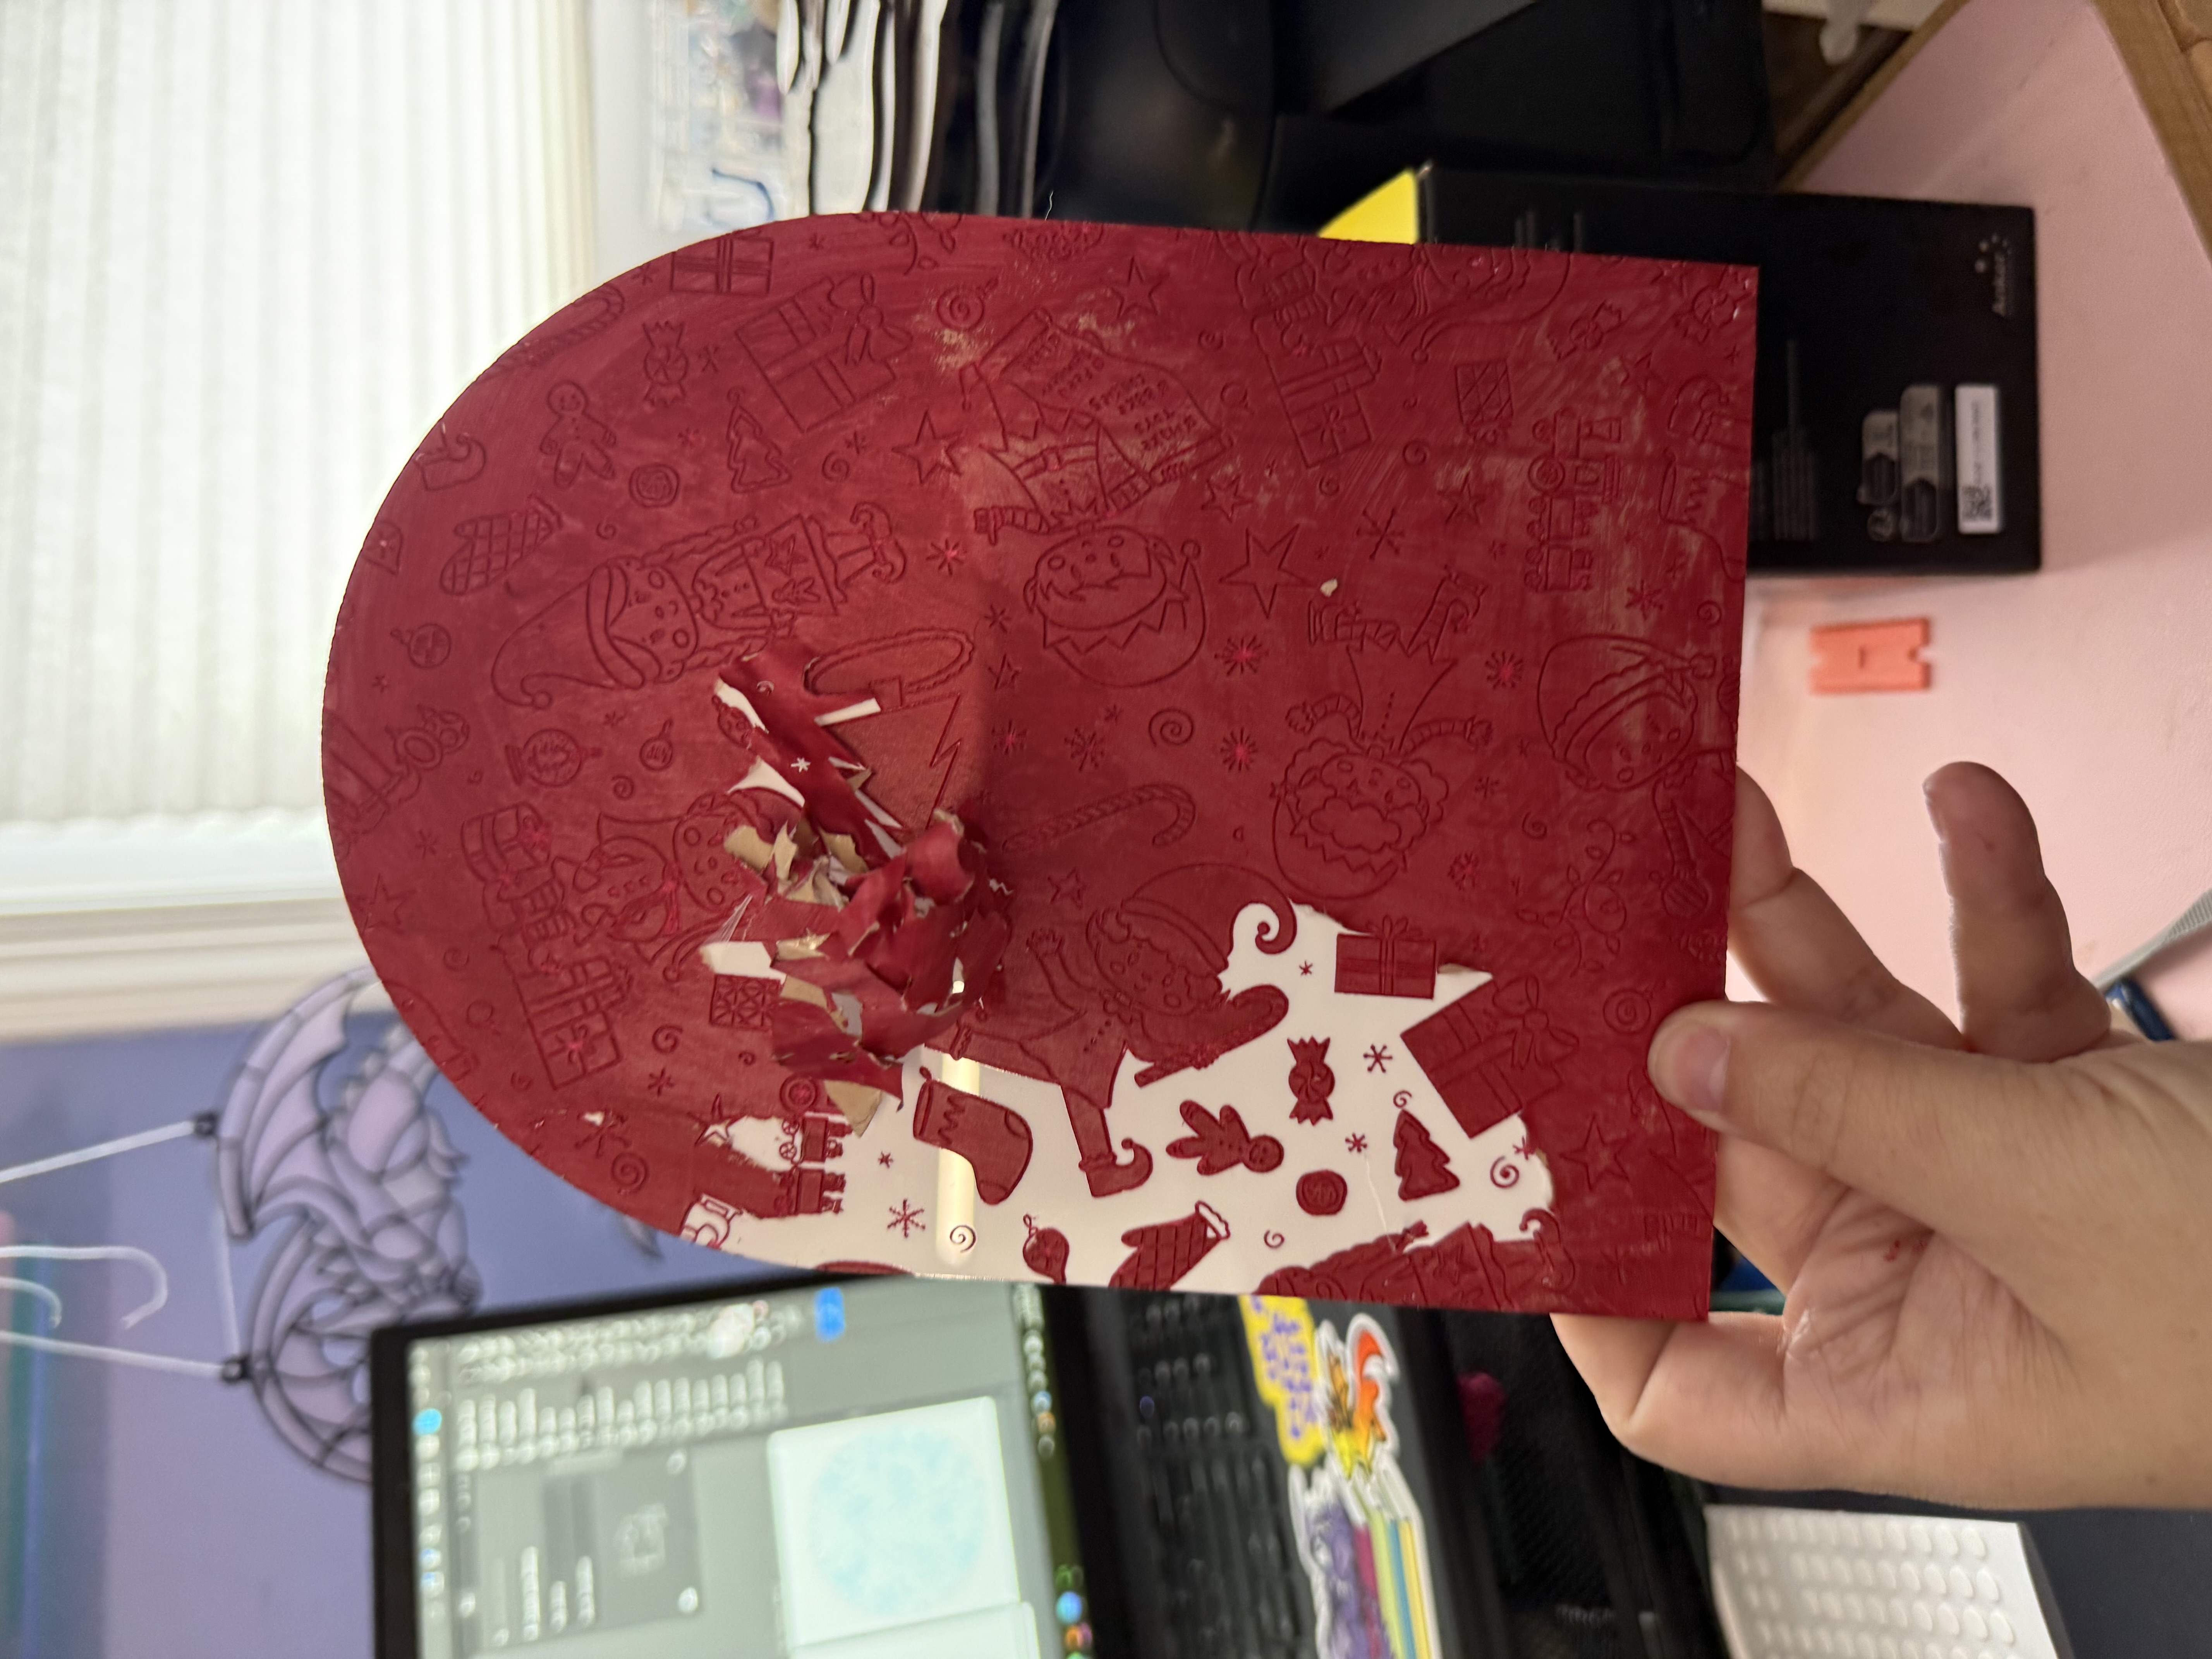
Exhibit B: post cleanup, pre- finishing. You didn’t ask but my favorite character is the dude with the thumbs up bc in my head he is salty AF about having to do Santa’s list for him. Also, back to the actual point… Look how crisp it is!!
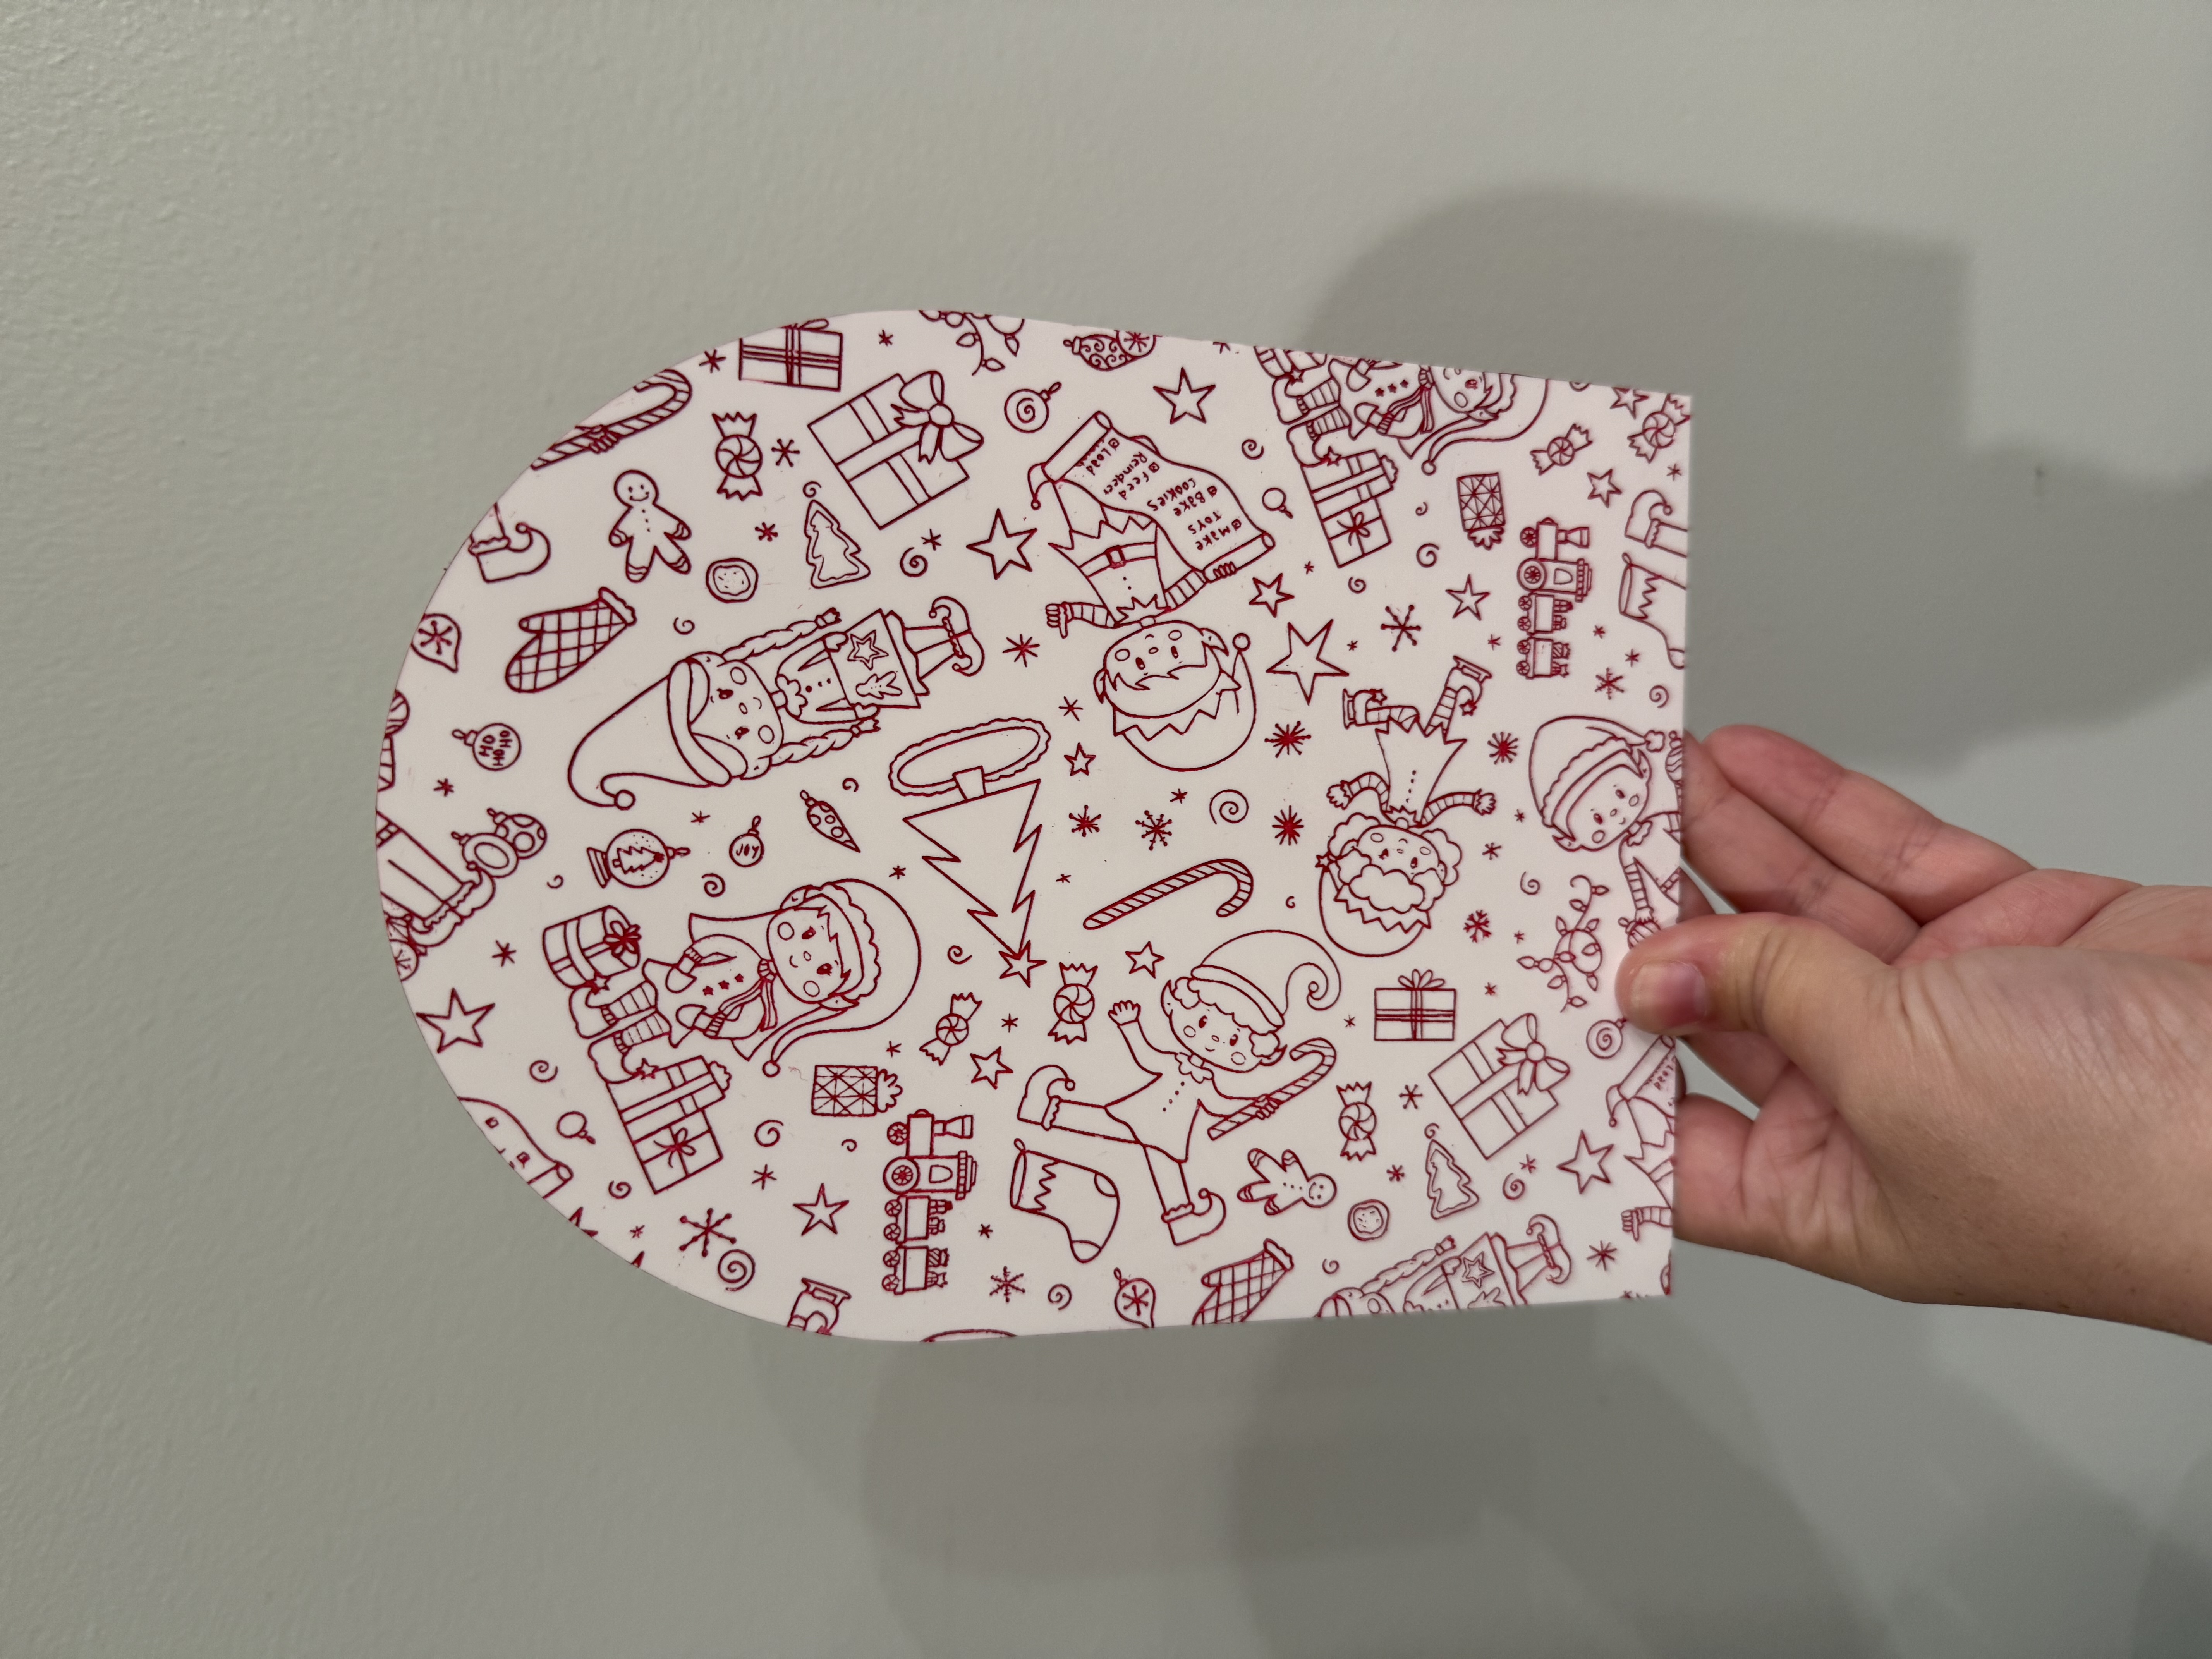
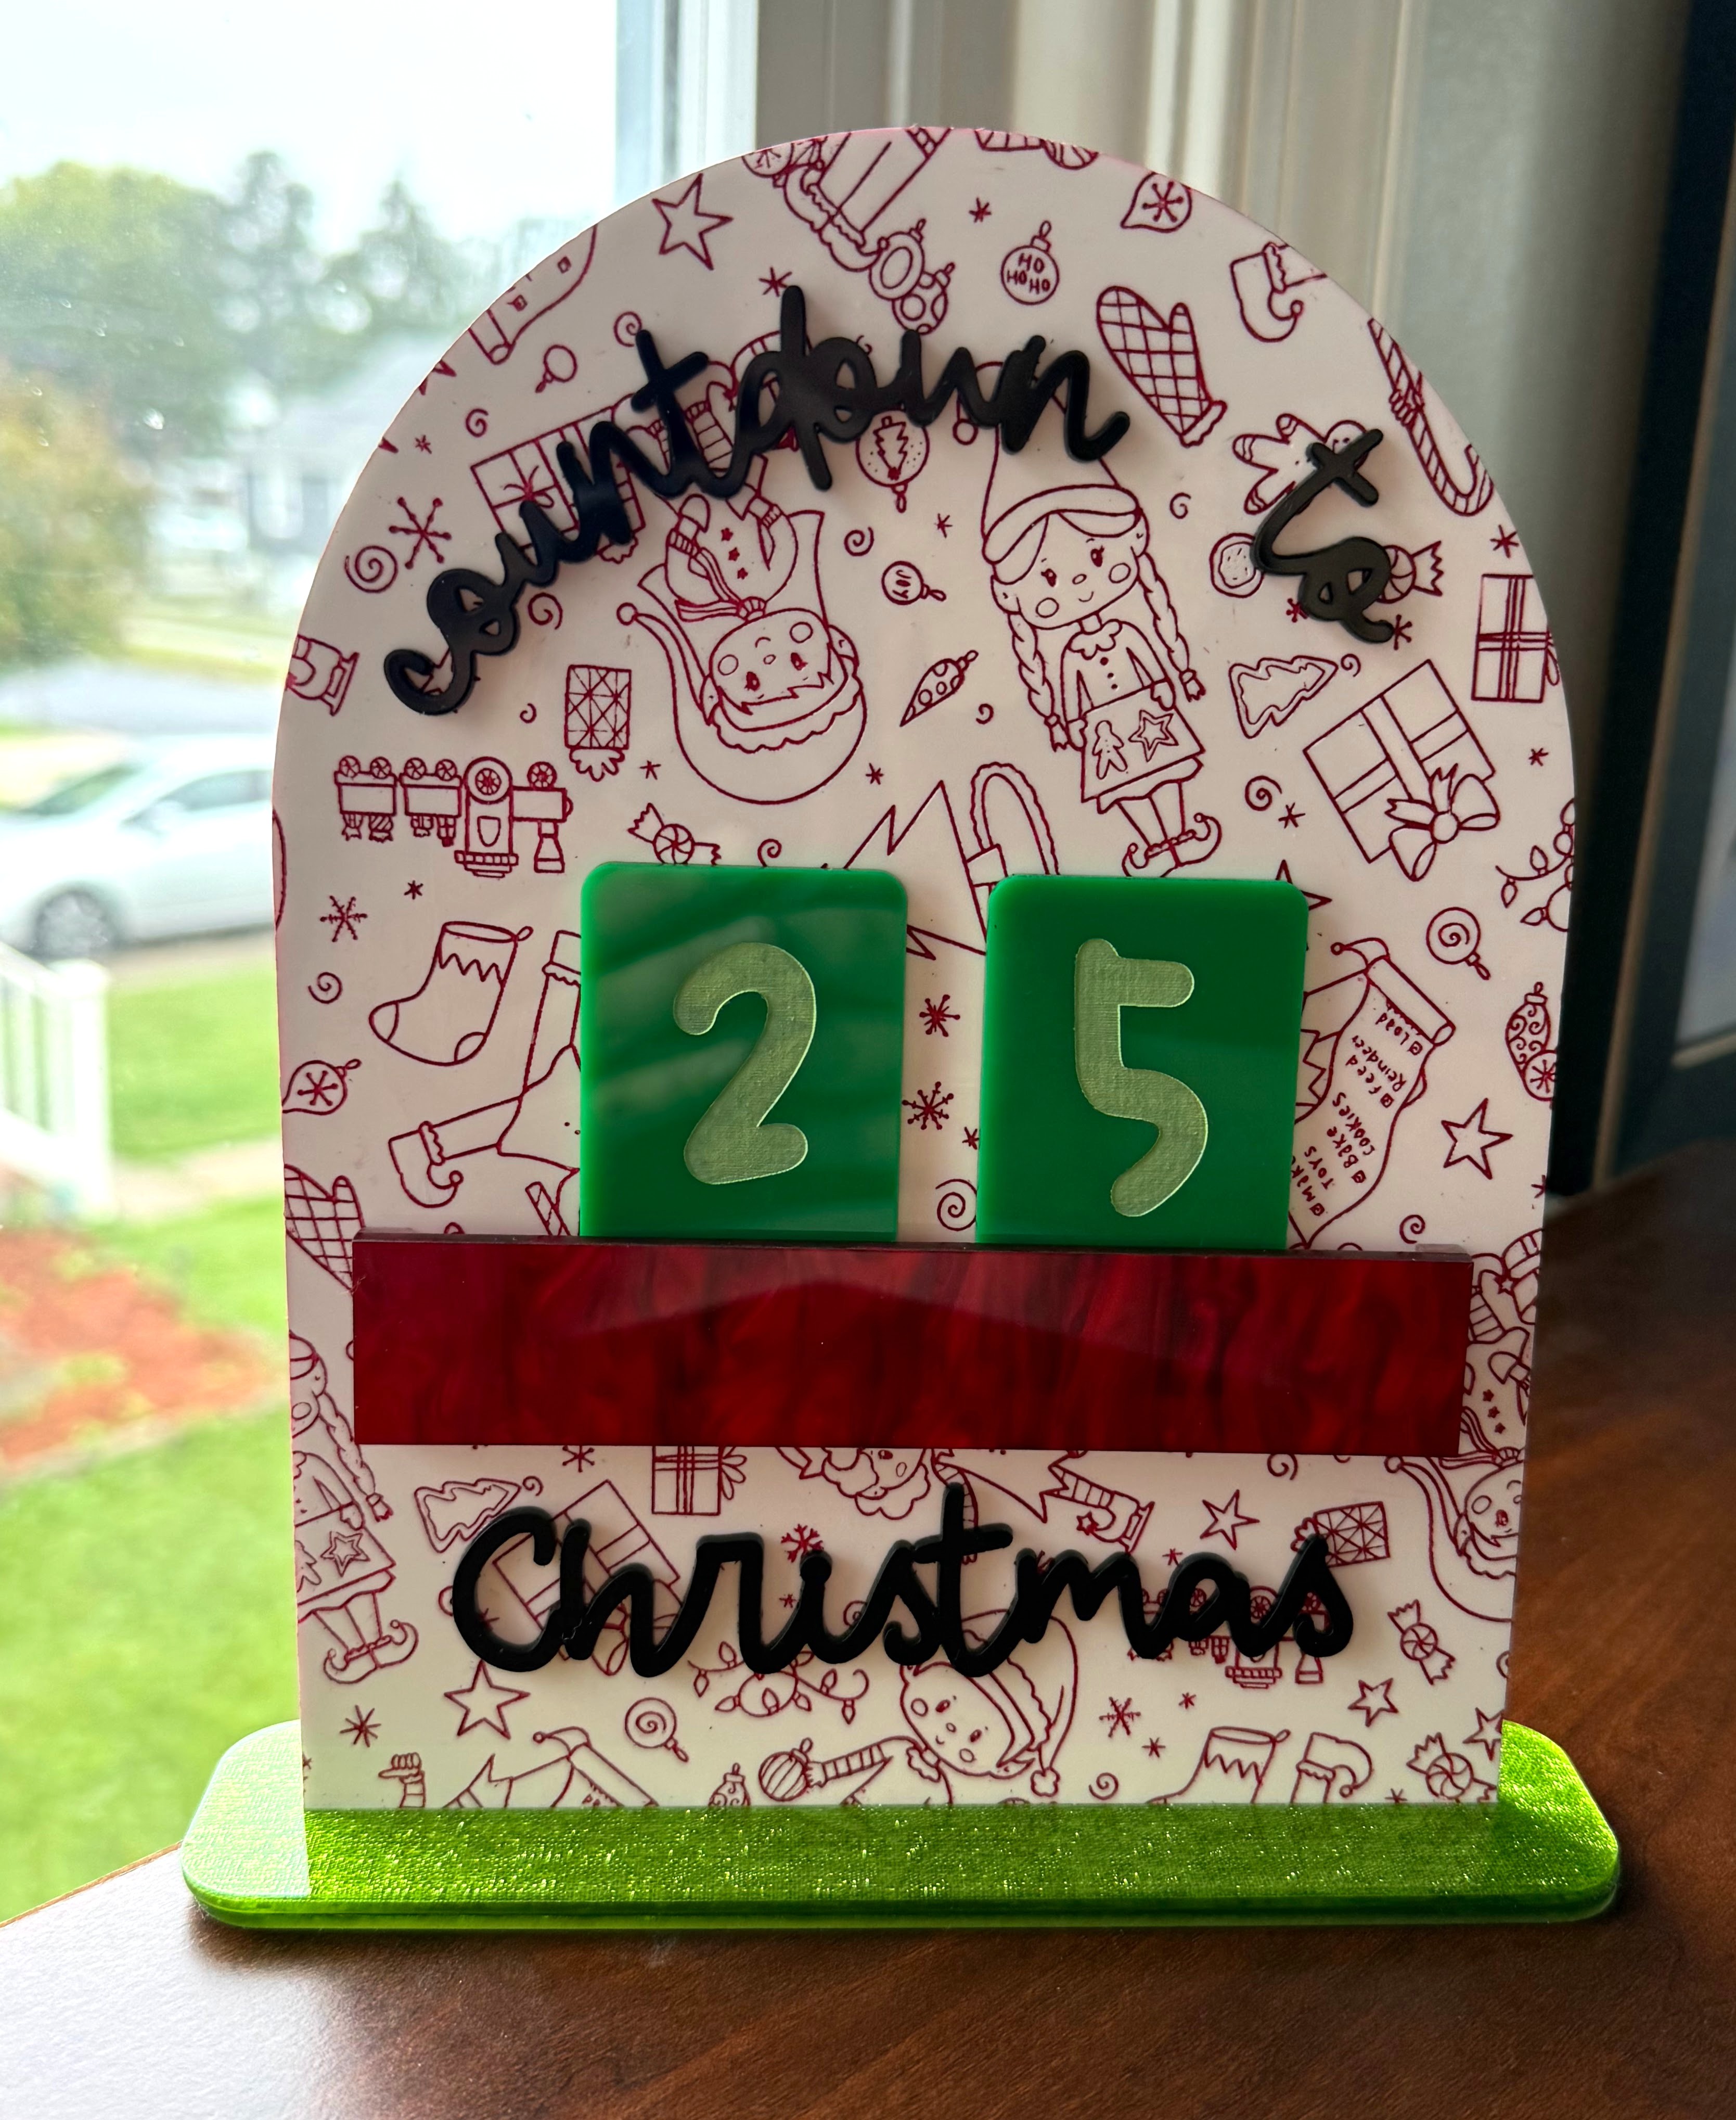
Exhibit C: final piece, and it’s worth the hassle. Which is honestly just the scraping part, everything else is fine.
Ok, that's all I have for you. Hope you enjoyed my slightly unhinged rambling about paint filling. Byeeee.